You Can Do It! Use Your Photographs for Designing a Quilt
Good Afternoon! It's Tuesday and we had a beautiful sunny, high of 50 degree day yesterday, however today is very gray. Our new weatherman on the local TV station mentioned rain for today. So far, there's no rain but I'm not rushing out the door as I did yesterday to get out in the sun and get things done around town.
How's the weather where you are? Any signs of flowers coming up? I can't wait. Love my flowers!
Flowers and living things are on my mind recently, but the focus is on Italy. I travelled there a few years ago and would love to return sometime, especially to Tuscany. Memories of winding hills, vineyards, flower boxes in windows, hillside towns with amazing doors and stone work are images I think of. You all know the colors that shout Tuscany. Burnt orange, deep and light greens, blue Tuscan skies, sunflower yellow. I could go on.
Since there isn't a trip planned in the near future I decided to dig into the nine hundred or so photos I took while there and see what I could come up with for a Tuscany Quilt. It is now designed and I am gathering fabrics, cottons and wool, but have a good start.
If you have a favorite place you have visited and what to create your quilt with those photos, then DO IT!!!! I taught high school art and photography for many years and that's what my kids would say to you because they heard it from me many times. You really can do this!
Let's get your images together first. This describes my process for the Fruit Quilt I am working on.
1. Gather your favorite photos, perhaps start with ten.
2. Arrange them on a table in an order similar to how you would in the quilt.
3. What is the main subject of the photo and can you simplify it down to basic shapes? If you can do that, you've got it made. If not, move on to another photo. Sometimes images are pretty complicated and just have too much in them. Shoot simple one or two subject photos for quilt designing of wool quilts with embroidery. Remember that the embellishment will add all the detail you need. OR you can crop the photo too. Remove those that just don't work.
4. Now that you have sorted through the photos think about the colors of the subjects. Is there a variety of color. If many of the subjects have the same color you may want to make changes or make it a monochromatic quilt. Move the photos around to compose a rectangle or square with the photos.
5. Once you like the arrangement grab piece of paper and do a rough sketch. Yes, I said rough. Don't stress! It's only for placement and sizes. Some blocks might be rectangular while others are square. Do you want one block to be the main subject. Put that one in place first then.
6. How big do you want the blocks? Think about your other works. I usually go with no larger than 12". I draw the individual block borders on tracing paper. Once I have a good sketch I draw the basic shapes of the objects on the tracing paper. Remember don't worry about details.
7. Arrange your quilt blocks on your design wall or floor and decide if that's the placement you want. Do the sizes of the subjects in the blocks seem big enough? If not, try looking at your computer with the digital photo on the screen and enlarge it. Give yourself the opportunity to put down the basic shape the size you want it to be by tracing it from the screen image.
8. Think about inner borders and make sure to add those to your sketch if you want them.
9. Work with your blocks on the tracing paper remembering to refine the shapes to simple ones. The embellishment will add all the detail you need.
10. You now need to look at those photos and shop for fabric!!!! I use cotton and wools and love combining the two. Sometimes I will add inner simple shapes for added embellishment.
Here are a few photos of a Fruit Quilt I am working on. Remember it's in the beginning stage where I am stitching the pieces to the background. I will have this in a pattern in the near future on my website www.felicequiltdesigns.com
At this point I stitch down all the shapes to the blocks and then begin to plan the embellishment stitch I will use for each part and the colors of thread I need. When it is completed I will post it here. What do you think so far? Are you interested in a Fruit Quilt?
How's the weather where you are? Any signs of flowers coming up? I can't wait. Love my flowers!
Flowers and living things are on my mind recently, but the focus is on Italy. I travelled there a few years ago and would love to return sometime, especially to Tuscany. Memories of winding hills, vineyards, flower boxes in windows, hillside towns with amazing doors and stone work are images I think of. You all know the colors that shout Tuscany. Burnt orange, deep and light greens, blue Tuscan skies, sunflower yellow. I could go on.
Since there isn't a trip planned in the near future I decided to dig into the nine hundred or so photos I took while there and see what I could come up with for a Tuscany Quilt. It is now designed and I am gathering fabrics, cottons and wool, but have a good start.
If you have a favorite place you have visited and what to create your quilt with those photos, then DO IT!!!! I taught high school art and photography for many years and that's what my kids would say to you because they heard it from me many times. You really can do this!
Let's get your images together first. This describes my process for the Fruit Quilt I am working on.
1. Gather your favorite photos, perhaps start with ten.
2. Arrange them on a table in an order similar to how you would in the quilt.
3. What is the main subject of the photo and can you simplify it down to basic shapes? If you can do that, you've got it made. If not, move on to another photo. Sometimes images are pretty complicated and just have too much in them. Shoot simple one or two subject photos for quilt designing of wool quilts with embroidery. Remember that the embellishment will add all the detail you need. OR you can crop the photo too. Remove those that just don't work.
4. Now that you have sorted through the photos think about the colors of the subjects. Is there a variety of color. If many of the subjects have the same color you may want to make changes or make it a monochromatic quilt. Move the photos around to compose a rectangle or square with the photos.
5. Once you like the arrangement grab piece of paper and do a rough sketch. Yes, I said rough. Don't stress! It's only for placement and sizes. Some blocks might be rectangular while others are square. Do you want one block to be the main subject. Put that one in place first then.
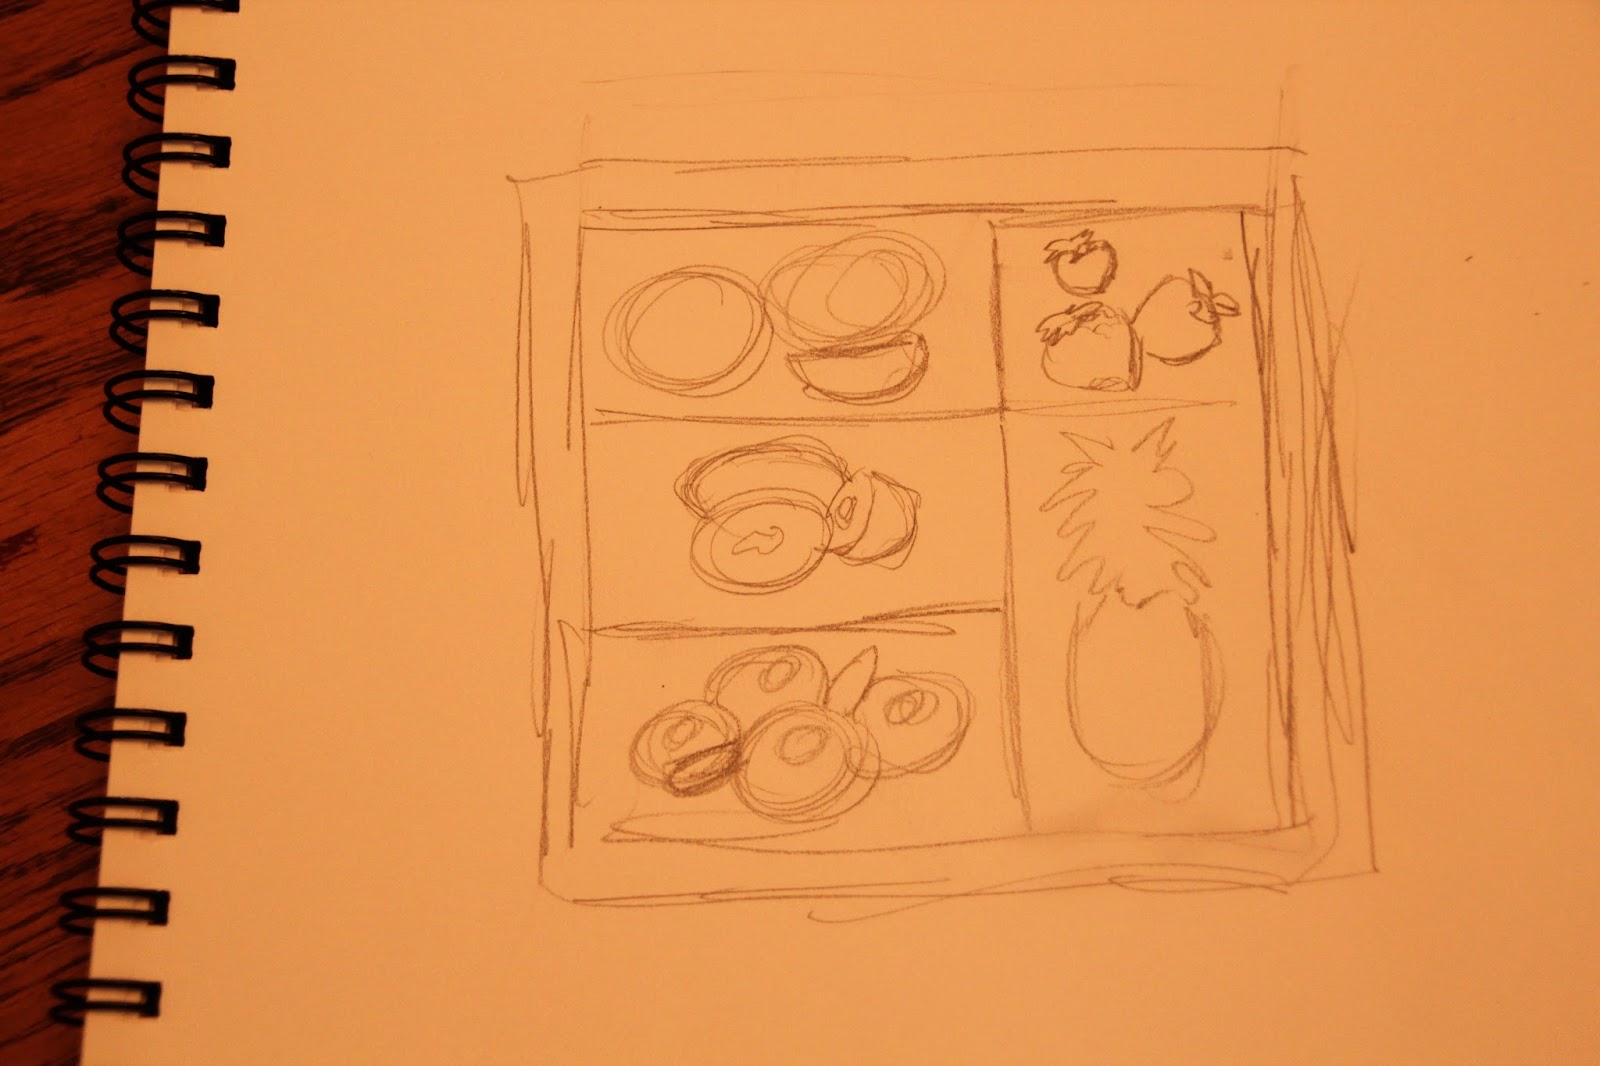 |
| Really rough sketch! |
6. How big do you want the blocks? Think about your other works. I usually go with no larger than 12". I draw the individual block borders on tracing paper. Once I have a good sketch I draw the basic shapes of the objects on the tracing paper. Remember don't worry about details.
 |
| Tracing paper shapes for kiwi |
8. Think about inner borders and make sure to add those to your sketch if you want them.
9. Work with your blocks on the tracing paper remembering to refine the shapes to simple ones. The embellishment will add all the detail you need.
10. You now need to look at those photos and shop for fabric!!!! I use cotton and wools and love combining the two. Sometimes I will add inner simple shapes for added embellishment.
 |
| Wools from www.In the Patch Designs.com |
Here are a few photos of a Fruit Quilt I am working on. Remember it's in the beginning stage where I am stitching the pieces to the background. I will have this in a pattern in the near future on my website www.felicequiltdesigns.com
 |
| Cotton applique pieces ready to stitch onto the background |
 |
| Kiwi with the shapes stitched in place and ready for embellishment |
Happy Designing! Remember, shoot simple one or two subject photos and have fun using your photos to create your own works.
Felice
Felice


Comments
Post a Comment